Few weeks ago I was writing about my own sandbox setup, which I run at home. But hey, we are in 2019! Why not run it in the cloud? The main reason was I didn’t need much power (CPU or memory) for my sandboxes and therefore my small host at home was more than enough.
No need to say that when I started working on Machine Learning on a graph of the whole Wikipedia site I quickly was out of resources (it only needed 200Gb of RAM…).
I then started setting up a sandbox in Oracle Cloud, to have the flexibility to have more resources than the limited hardware I have at home, and also to have an easier integration with other cloud services, like the database, without going into security and firewall configuration.
JupyterLab notebook on Oracle Cloud
As my previous post says, I’m fully into JupyterLab as my sandbox environment for both machine learning and property graphs activities. Some Oracle Cloud services come with Apache Zeppelin (like the ML notebooks with the Autonomous Database), but it isn’t really customizable or extensible.
This is why I stick to JupyterLab, not changing my habits and having full control on the environment and the various kernels I run.
There isn’t an Oracle Cloud service providing it directly, therefore I simply setup a Compute Instance (a virtual machine in the cloud) which I configure by installing Python 3.6 first, JupyterLab after and all the extra things I could need later.
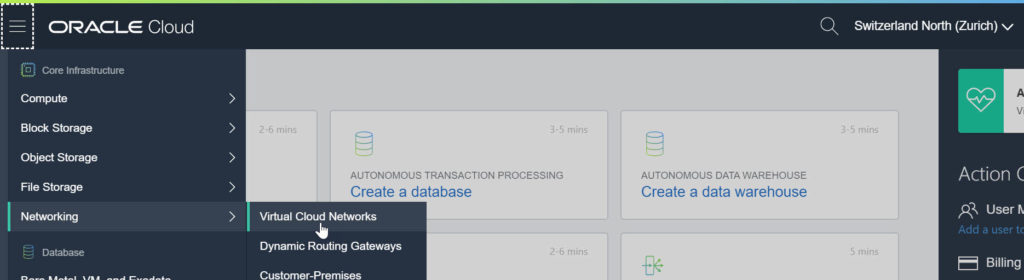
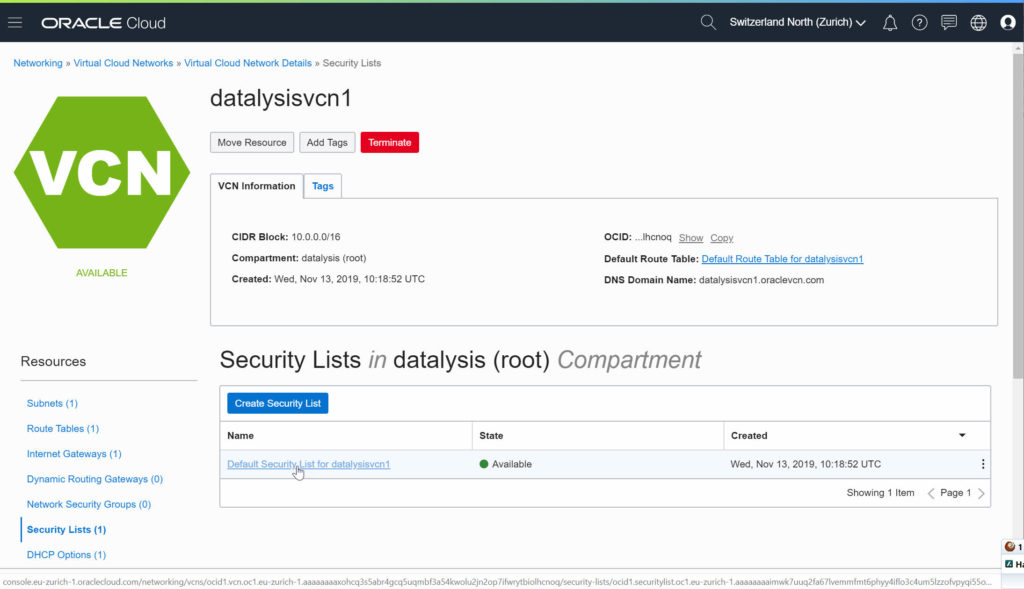
First thing: setup a Virtual Cloud Network
One could directly start by creating a Compute Instance and the “cloud” will take care to create all the extra bits needed.
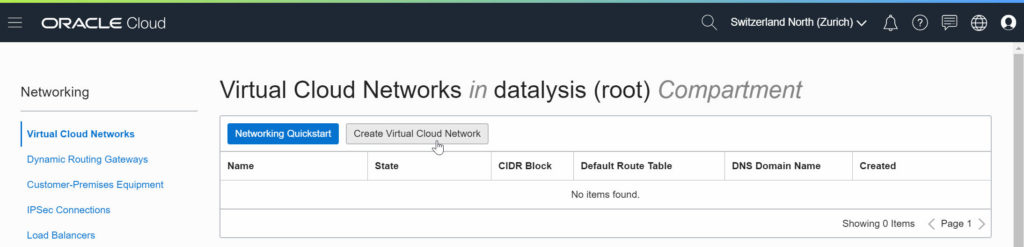
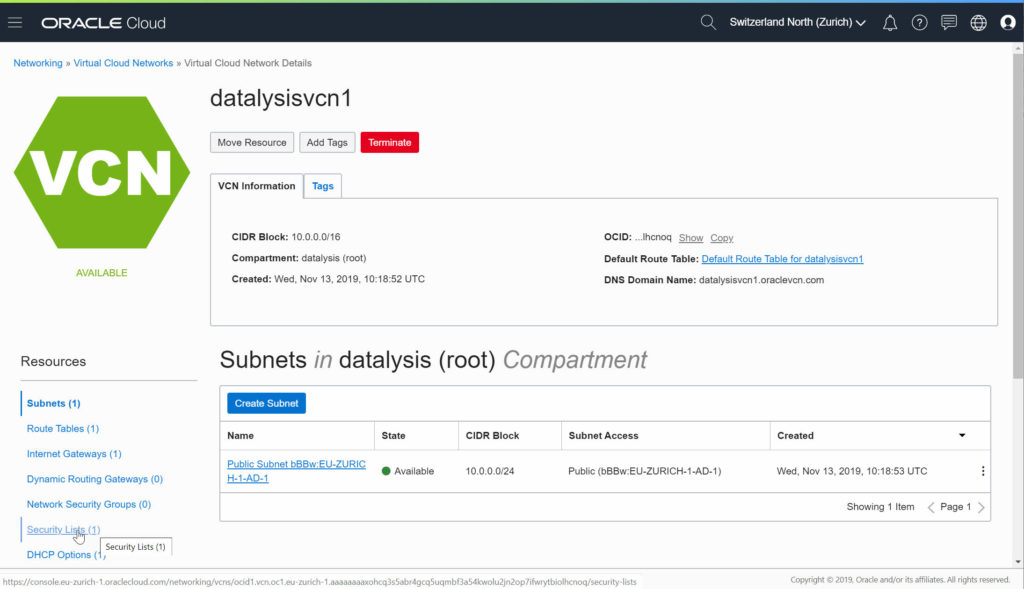
But doing things from the beginning first I create a Virtual Cloud Network, which I will be able to configure and name as I want instead of having a random generated name and default settings everywhere.
If you used virtual machines already, either VirtualBox or VMware or others, you are probably already used to have to deal with networking. Defining the virtual networks connected to the VMs depending on how isolate or reachable from outside it must be etc. In the cloud it isn’t much different.
A Virtual Cloud Network will be used by any Oracle Cloud service based on OCI. More and more services are like that and even Analytics (OAC) which wasn’t is being ported to OCI (deployment in progress).
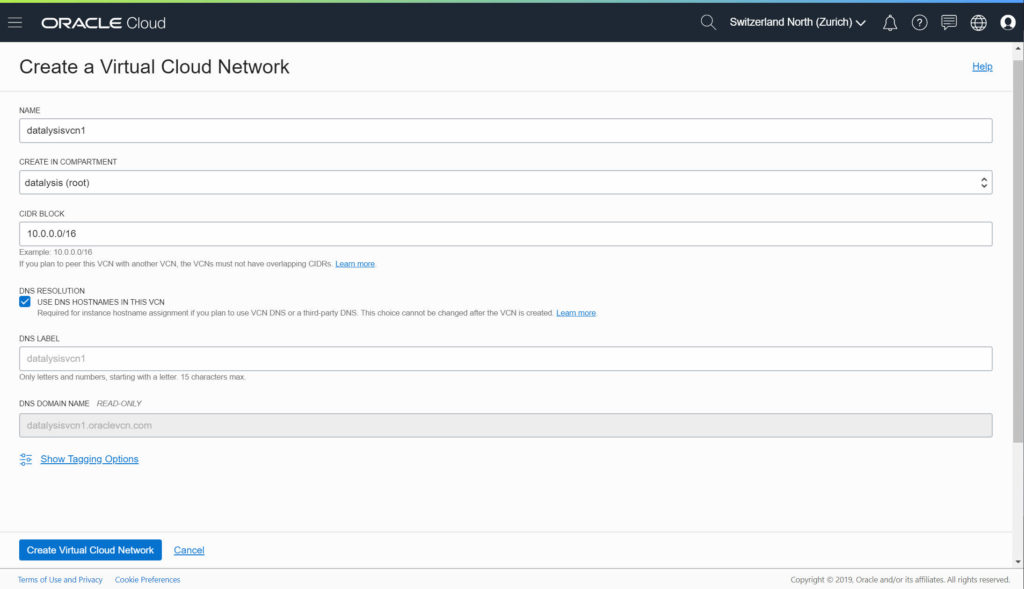
The CIDR BLOCK is a parameter which can either set as the example to 10.0.0.0/16 (giving you up to 65’536 addresses available, probably more than enough) or set to something different. You have to keep a private network, so 10.x.x.x or 192.168.x.x or 172.16-31.x.x. If you have a whole network architecture in mind you can tailor it based on those needs, for a majority a classical 10.0.0.0/16 will be more than enough.
I also enable the DNS RESOLUTION as some other services, like the DBaaS, can use it. It will allow to reference instances by domain names instead of just IP addresses, which can be more friendly in knowing to what we are connecting.
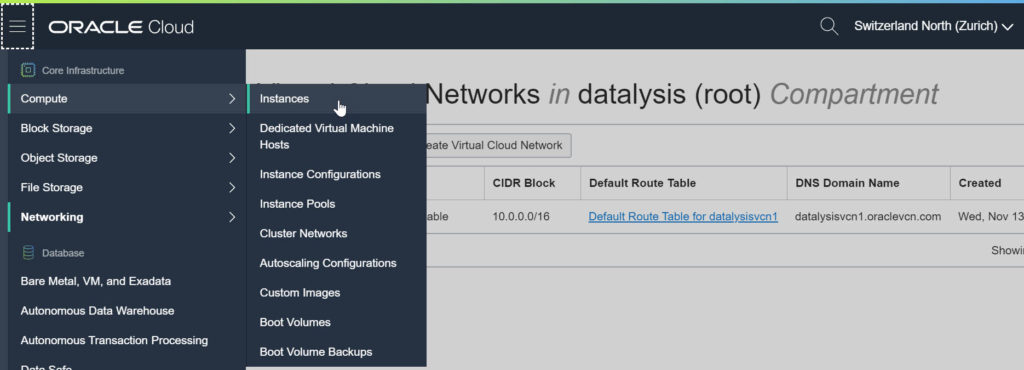
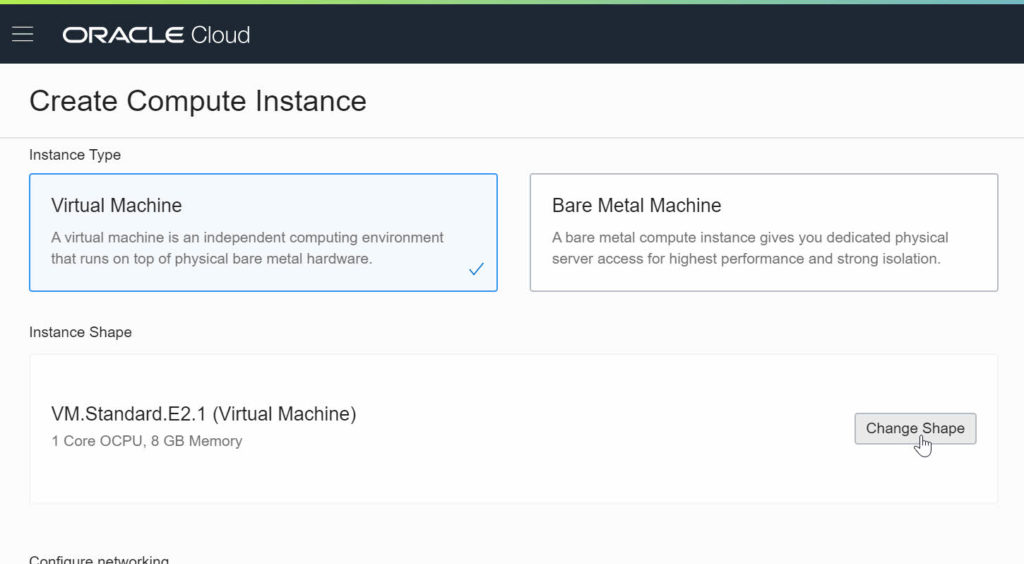
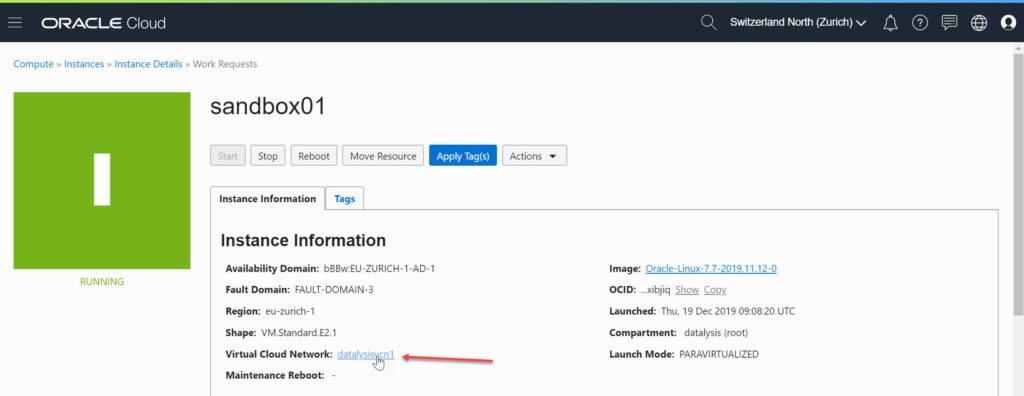
Time to create a new Compute Instance
Once the network is done, it’s time to move on to the Compute Instance itself.
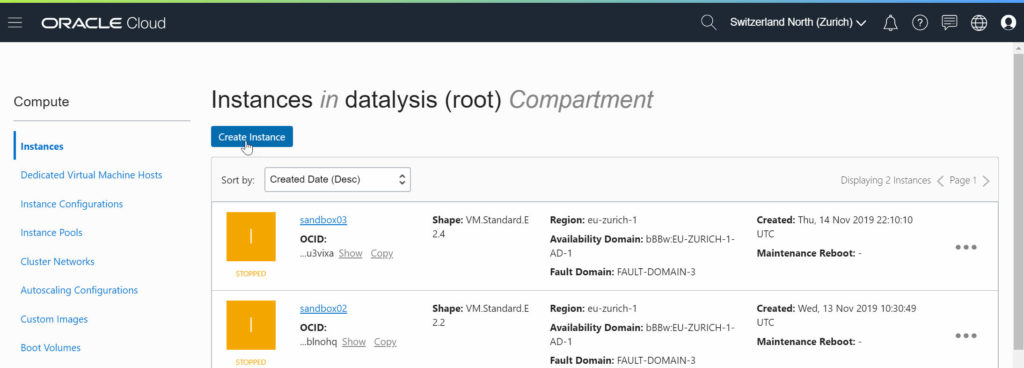
There are now a lot more options which can be set compared to the Virtual Cloud Network, but the interface will give you many defaults / pre-selected values making things easier.


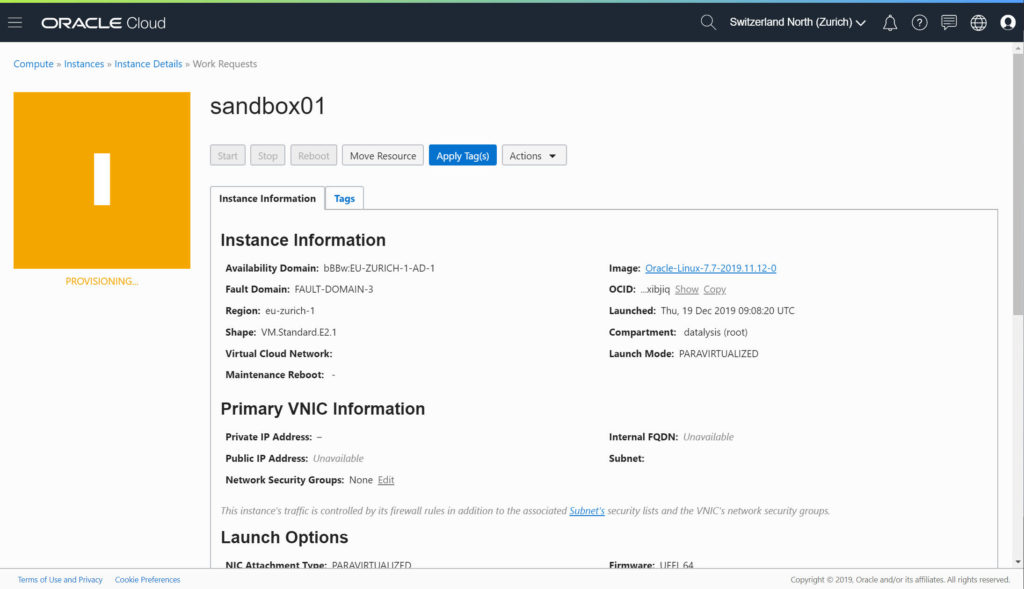
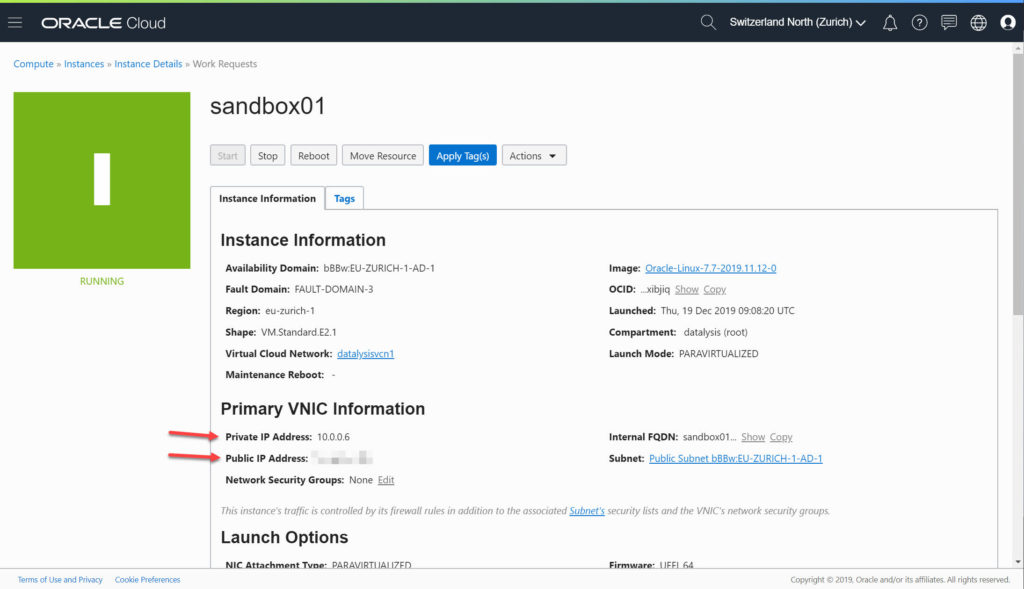
The provisioning took (for me) less than a minute, the Compute Instance quickly switched to “green”.
Once it is running you can find the private IP address (received by the Virtual Cloud Network) and, if you selected to get one, the public IP address you can use to connect from outside.
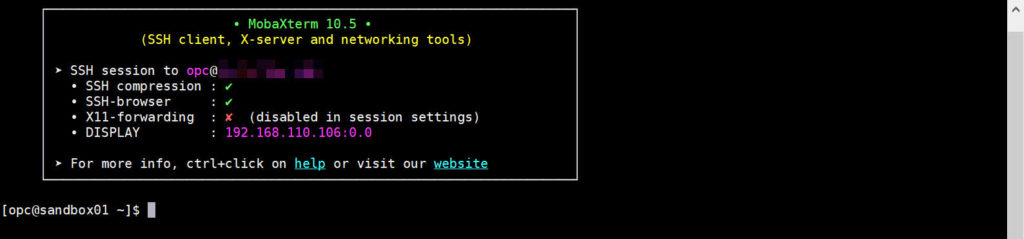
Connect via SSH to the Compute Instance
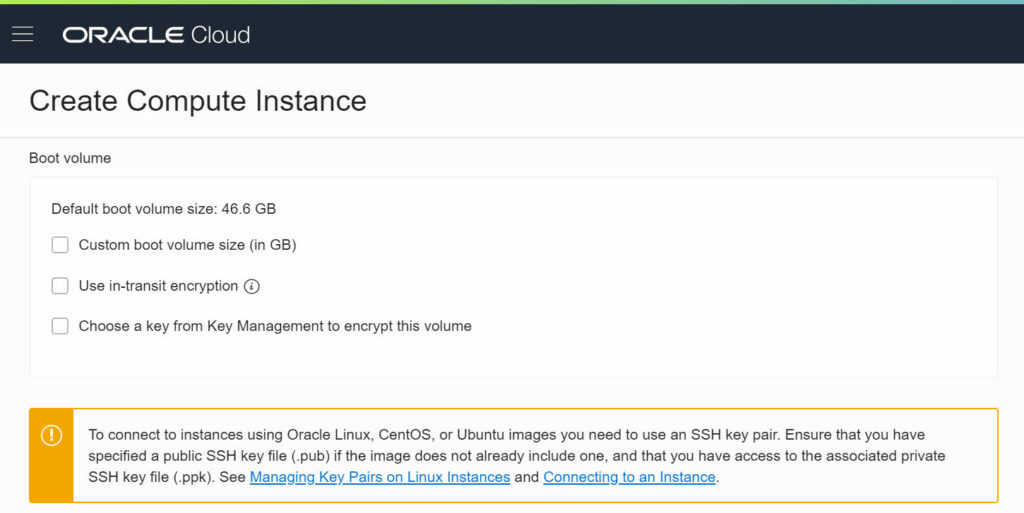
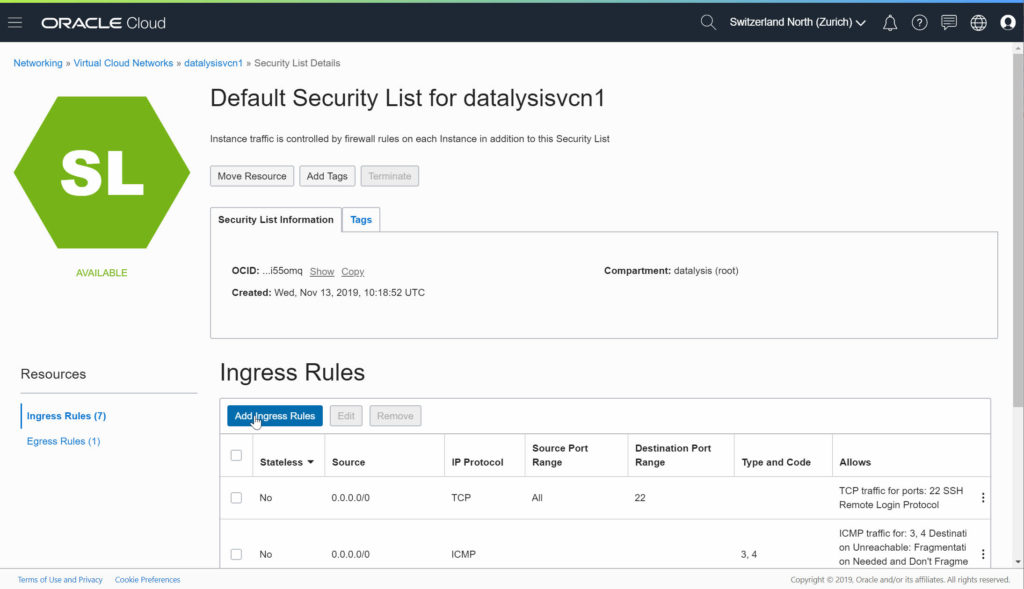
The Virtual Cloud Network has, by default, a rule allowing SSH (port 22) connections to instances. If your Compute Instance has a public IP address and you selected either Oracle Linux 7.7 or Oracle Autonomous Linux the username to use is opc. Other images can have other usernames, check the documentation to find out what it is.
Install JupyterLab
I always start by updating the whole system, updating all the installed packages by entering:
|
1 |
sudo yum update -y |
In Oracle Linux 7.7 there is by default Python 2 installed (2.7.5 at the time of writing). I prefer to use Python 3 for all my notebooks and also for the setup of JupyterLab.
Before to install it, I always check which repositories are enabled because Python 3 can be provided by more than one, and therefore I want to figure out if I need to disable a repository or enable one to install what I need.
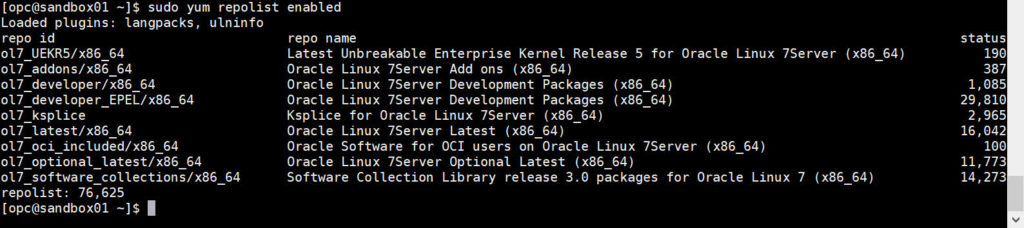
Both “ol7_latest” and “ol7_developer_EPEL” can provide Python 3, I therefore use “ol7_latest” by disabling the EPEL one at install.
|
1 |
sudo yum install -y --disablerepo=ol7_developer_EPEL python3 |
Once done I have now 2 different Python available.

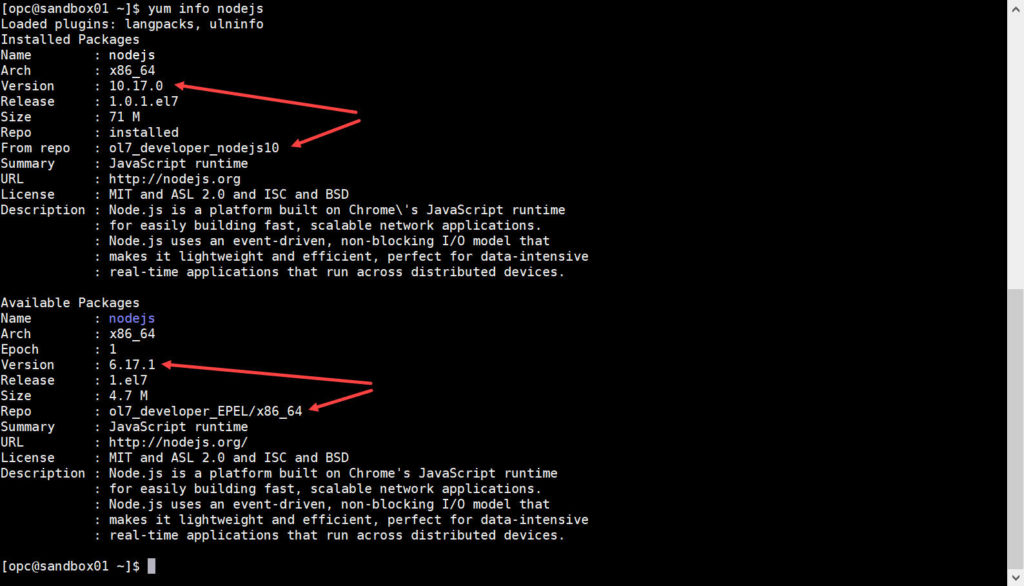
JupyterLab use Node.js to compile extensions, by default an older version is available in the system and some extensions display warning messages that a newer Node.js would be better. Just like with Python 3 multiple repositories could provide Node.js, and by disabling the EPEL one again I can get the newer version.
|
1 2 |
sudo yum install -y oracle-nodejs-release-el7 sudo yum install -y --disablerepo=ol7_developer_EPEL nodejs |

Python virtual environments to keep things simple and clean
Just like two different versions of Python can coexist in the system, it’s often possible that different projects have different dependencies, maybe the same package is needed but in different versions.
To keep things simple and clean I always create Python virtual environments based on my needs. In this way all the packages I need are installed into an “isolated” environment without affecting the system-wide Python or any other Python virtual environment. It duplicates things on disk, but it’s a price I’m happy to pay to keep things clean.
|
1 2 3 4 5 6 7 8 |
python3 -m venv ~/py36env # activate the virtual environment source ~/py36env/bin/activate # make sure the right python has been used # (as you see now 'python' is Python 3) python # update PIP, the Python package manager system pip install --upgrade pip |
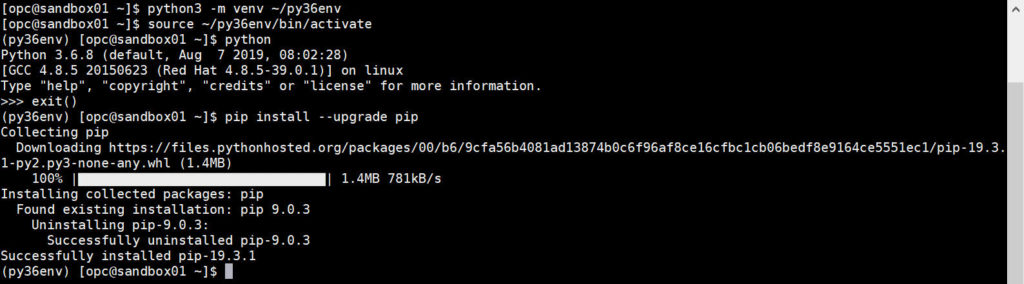
The Python virtual environment, when enabled, redefine the python and pip commands to point to the Python 3 of the virtual environment and the PIP of the virtual environment too.
Installing JupyterLab is a single command:
|
1 |
pip install jupyterlab |

Running JupyterLab
Everything is installed, JupyterLab must work…

By default, JupyterLab (and Jupyter) works locally and when started automatically open the browser pointing to the right address. This will work if you install the tool on your own laptop. To work as a proper Client-Server with JupyterLab running in a remote instance some extra configs are needed.
First the JupyterLab config file must be generated. And once the file is there, it has to be edited to add some extra settings.


|
1 2 3 4 5 6 7 8 9 10 |
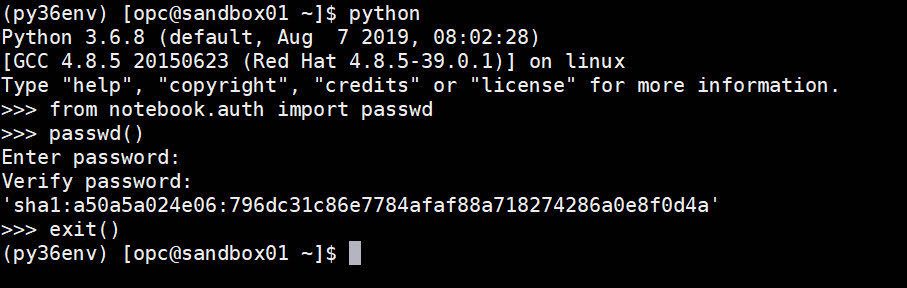
# Enable Jupyter to accept connection from outside the host running it c.NotebookApp.allow_remote_access = True # Accept connection come from any source c.NotebookApp.ip = '*' # Do not open a browser (as there isn't any and it's a remote setup) c.NotebookApp.open_browser = False # Use this folder as 'root' folder for the notebooks (need to create it) c.NotebookApp.notebook_dir = u'/home/opc/jupyter' # Instead of a random token, use this password as login c.NotebookApp.password = u'…' |
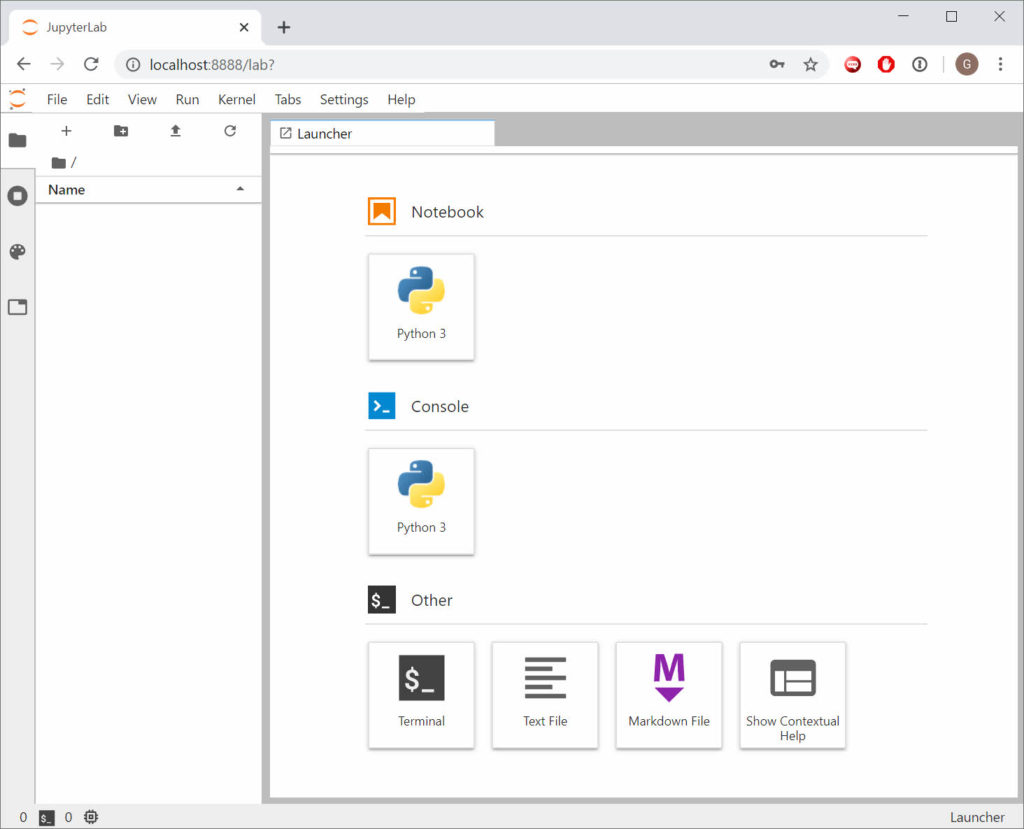
Once the configuration is done, it is possible to start JupyterLab (again) and hopefully this time everything works!

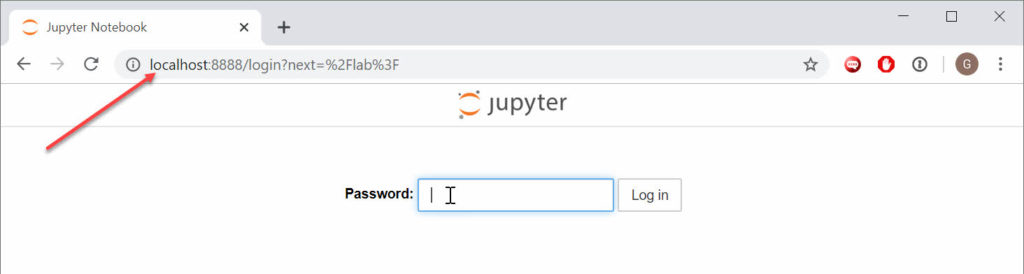
The notebook can be tested by setting up an SSH tunnel forwarding requests to localhost:8888 on my laptop to the Compute Instance on port 8888 directly.
Enable access to JupyterLab using the public IP of the Compute Instance

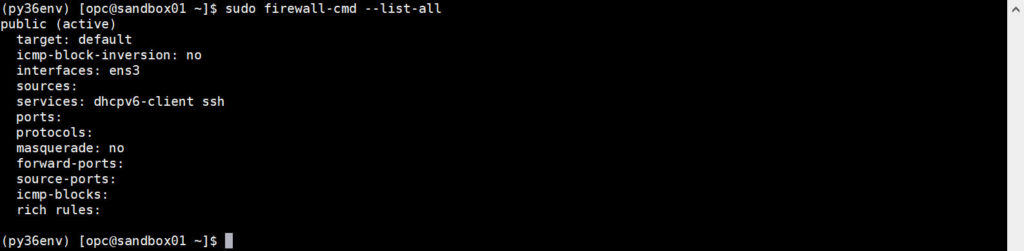
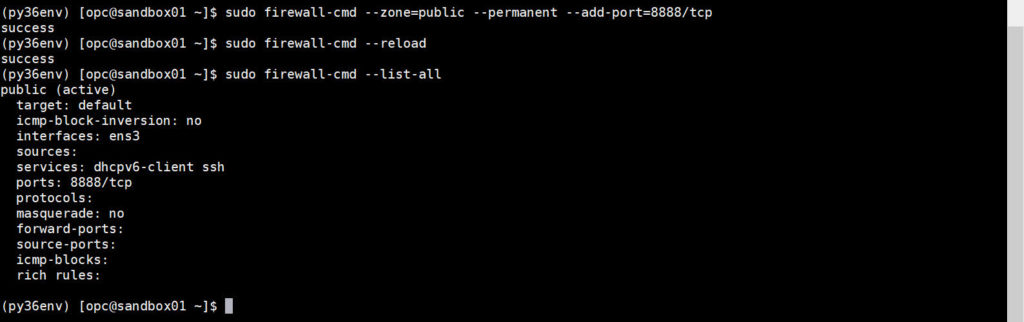
The Compute Instance has a firewall running, to enable connections from outside to port TCP 8888, the default JupyterLab one, the firewall must be configured by opening the port.
|
1 2 |
sudo firewall-cmd --zone=public --permanent --add-port=8888/tcp sudo firewall-cmd --reload |
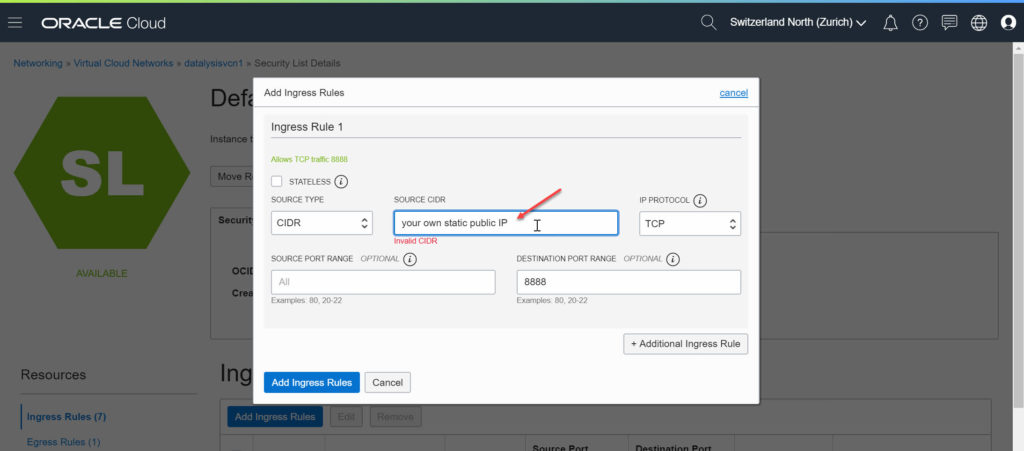
The Virtual Cloud Network must also be configured to allow access from outside to port 8888 because by default only port 22 for SSH is open.
Done! JupyterLab is now accessible
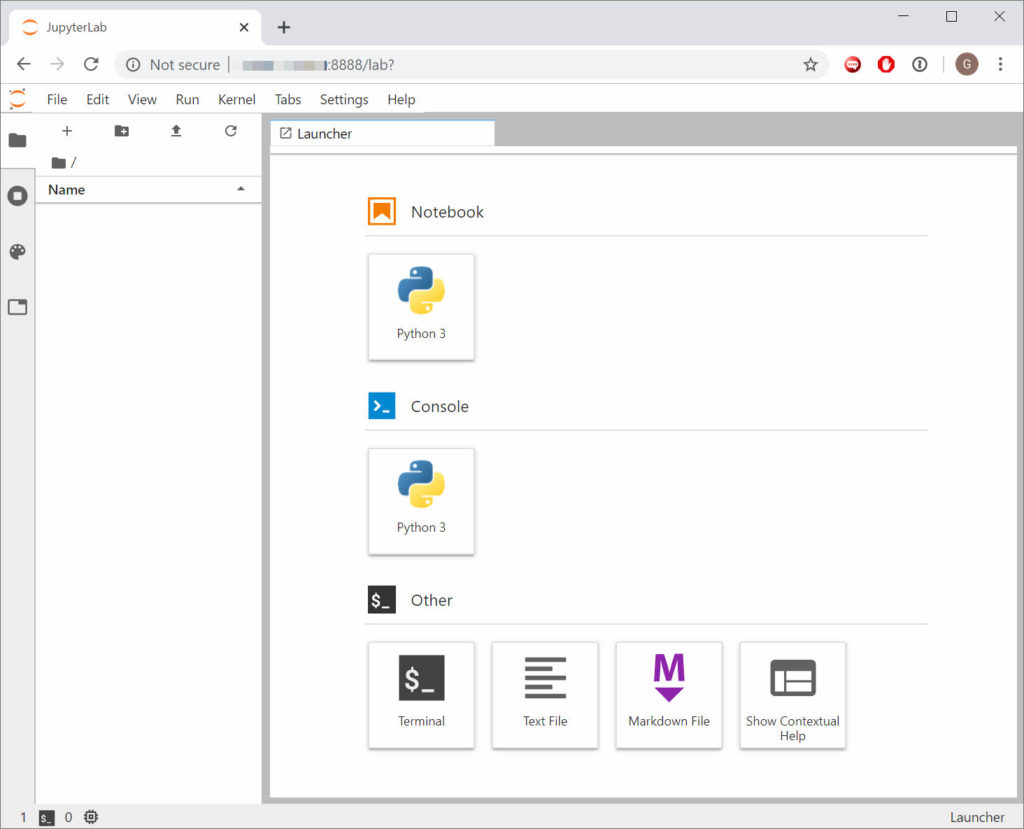
Right now, JupyterLab works because started via an SSH session, if I close the session JupyterLab will be stopped as well. It’s possible to setup a system service to get it started at boot of the Compute Instance.
It’s also possible to install new kernels, install extensions and any other setting you would need. You have full access to the Compute Instance, nothing is blocked.
TL;DR
Once you have a running Compute Instance based on Oracle Linux 7.7 or Oracle Autonomous Linux:
|
1 2 3 4 5 6 7 8 9 10 11 12 13 14 15 16 17 18 19 20 21 22 23 24 25 26 27 28 29 30 31 32 33 34 |
sudo yum repolist enabled # is ol7_developer_EPEL enabled? # if 'yes', need to exclude it for Python and Node.js install # install python 3 sudo yum install -y --disablerepo=ol7_developer_EPEL python3 # install Node.js sudo yum install -y oracle-nodejs-release-el7 sudo yum install -y --disablerepo=ol7_developer_EPEL nodejs # create python 3 virtual env python3 -m venv ~/py36env source ~/py36env/bin/activate # update pip pip install --upgrade pip # install & configure JupyterLab pip install jupyterlab jupyter notebook --generate-config # by default ~/.jupyter/jupyter_notebook_config.py # add to the file: c.NotebookApp.allow_remote_access = True c.NotebookApp.ip = '*' c.NotebookApp.open_browser = False c.NotebookApp.password = u'sha1:4ac2e73c51ff:d84274597c8fe0f27ee99631cc3abf0d9300a26a' # 'oracle' c.NotebookApp.notebook_dir = u'/home/opc/jupyter' # Oracle Linux firewall sudo firewall-cmd --list-all sudo firewall-cmd --zone=public --permanent --add-port=8888/tcp sudo firewall-cmd --reload # start JupyterLab jupyter lab |